WebAssembly를 사용한 확장 개발 - 2부
2024년 6월 7일, Dirk Bäumer 작성
이전 블로그 게시물인 "WebAssembly를 사용한 확장 개발"에서 컴포넌트 모델을 사용하여 WebAssembly 코드를 Visual Studio Code 확장 프로그램에 통합하는 방법을 보여드렸습니다. 이번 블로그 게시물에서는 두 가지 추가적인 독립적인 사용 사례에 중점을 둡니다. (a) 워커(worker)에서 WebAssembly 코드를 실행하여 확장 프로그램 호스트의 메인 스레드를 차단하지 않도록 하고, (b) WebAssembly로 컴파일되는 언어를 사용하여 언어 서버(language server)를 만드는 것입니다.
이 블로그 게시물의 예제를 실행하려면 다음 도구가 필요합니다: VS Code, Node.js, Rust 컴파일러 툴체인, wasm-tools, 그리고 wit-bindgen.
워커에서 WebAssembly 코드 실행
이전 블로그 게시물의 예제에서는 VS Code 확장 프로그램 호스트 메인 스레드에서 WebAssembly 코드를 실행했습니다. 실행 시간이 짧은 경우에는 괜찮습니다. 하지만 시간이 오래 걸리는 작업은 확장 프로그램 호스트 메인 스레드가 다른 확장 프로그램을 위해 계속 사용 가능하도록 워커에서 실행해야 합니다.
VS Code 컴포넌트 모델은 워커와 확장 프로그램 메인 측 모두에서 필요한 글루 코드를 자동으로 생성할 수 있도록 하여 이를 더 쉽게 만드는 메타 모델을 제공합니다.
다음 코드 스니펫은 워커에 필요한 코드를 보여줍니다. 이 예제는 코드가 worker.ts라는 파일에 저장되어 있다고 가정합니다.
import { Connection, RAL } from '@vscode/wasm-component-model';
import { calculator } from './calculator';

async function main(): Promise<void> {
  const connection = await Connection.createWorker(calculator._);
  connection.listen();
}

main().catch(RAL().console.error);
이 코드는 확장 프로그램 호스트 메인 워커와 통신하기 위한 연결을 생성하고, wit2ts 도구에서 생성된 calculator 월드(world)로 연결을 초기화합니다.
확장 프로그램 측에서는 WebAssembly 모듈을 로드하고 calculator 월드에 바인딩합니다. 계산을 수행하는 해당 호출은 워커에서 비동기적으로 실행되기 때문에 await해야 합니다 (예: await api.calc(...)).
// The channel for printing the result.
const channel = vscode.window.createOutputChannel('Calculator');
context.subscriptions.push(channel);

// The channel for printing the log.
const log = vscode.window.createOutputChannel('Calculator - Log', { log: true });
context.subscriptions.push(log);

// The implementation of the log function that is called from WASM
const service: calculator.Imports.Promisified = {
  log: async (msg: string): Promise<void> => {
    // Wait 100ms to slow things down :-)
    await new Promise(resolve => setTimeout(resolve, 100));
    log.info(msg);
  }
};

// Load the WASM model
const filename = vscode.Uri.joinPath(
  context.extensionUri,
  'target',
  'wasm32-unknown-unknown',
  'debug',
  'calculator.wasm'
);
const bits = await vscode.workspace.fs.readFile(filename);
const module = await WebAssembly.compile(bits);

// Create the worker
const worker = new Worker(
  vscode.Uri.joinPath(context.extensionUri, './out/worker.js').fsPath
);
// Bind the world to the worker
const api = await calculator._.bind(service, module, worker);

vscode.commands.registerCommand(
  'vscode-samples.wasm-component-model-async.run',
  async () => {
    channel.show();
    channel.appendLine('Running calculator example');
    const add = Types.Operation.Add({ left: 1, right: 2 });
    channel.appendLine(`Add ${await api.calc(add)}`);
    const sub = Types.Operation.Sub({ left: 10, right: 8 });
    channel.appendLine(`Sub ${await api.calc(sub)}`);
    const mul = Types.Operation.Mul({ left: 3, right: 7 });
    channel.appendLine(`Mul ${await api.calc(mul)}`);
    const div = Types.Operation.Div({ left: 10, right: 2 });
    channel.appendLine(`Div ${await api.calc(div)}`);
  }
);
몇 가지 중요한 사항이 있습니다.
- 이 예제에서 사용된 WIT 파일은 이전 블로그 게시물의 계산기 예제에서 사용된 것과 다르지 않습니다.
- WebAssembly 코드 실행은 워커에서 이루어지므로, 가져온 서비스(예: 위의
log함수)의 구현은Promise를 반환할 수 있지만, 반드시 그래야 하는 것은 아닙니다. - WebAssembly는 현재 동기식 실행 모델만 지원합니다. 결과적으로, 워커에서 WebAssembly 코드를 실행하여 가져온 서비스를 호출하기 위해 확장 프로그램 호스트 메인 스레드로 호출하는 모든 호출은 다음 단계를 거쳐야 합니다.
- 호출할 서비스(예:
log함수 호출)를 설명하는 메시지를 확장 프로그램 호스트 메인 스레드로 보냅니다. Atomics.wait를 사용하여 워커 실행을 일시 중지합니다.- 확장 프로그램 호스트 메인 스레드에서 메시지를 처리합니다.
- 워커를 다시 시작하고
Atomics.notify를 사용하여 결과를 알립니다.
- 호출할 서비스(예:
이 동기화는 측정 가능한 시간 오버헤드를 추가합니다. 이러한 모든 단계는 컴포넌트 모델에서 투명하게 처리되지만, 개발자는 이를 인지하고 가져온 API 표면을 설계할 때 이를 고려해야 합니다.
이 예제의 전체 소스 코드는 VS Code 확장 샘플 저장소에서 찾을 수 있습니다.
WebAssembly 기반 언어 서버
VS Code for the Web용 WebAssembly 지원 작업을 시작했을 때, 우리가 구상했던 사용 사례 중 하나는 WebAssembly를 사용하여 언어 서버를 실행하는 것이었습니다. VS Code의 LSP 라이브러리에 대한 최신 변경 사항과 WebAssembly와 LSP를 연결하는 새로운 모듈의 도입으로, WebAssembly 언어 서버를 구현하는 것은 운영 체제 프로세스로 구현하는 것만큼이나 간단해졌습니다.
또한, WebAssembly 언어 서버는 WASI Preview 1을 완벽하게 지원하는 WebAssembly Core Extension에서 실행됩니다. 이는 언어 서버가 파일이 GitHub 리포지토리와 같이 원격에 저장되어 있더라도 프로그래밍 언어의 일반적인 파일 시스템 API를 사용하여 워크스페이스의 파일에 액세스할 수 있음을 의미합니다.
다음 코드 스니펫은 lsp_server 크레이트의 예제 서버를 기반으로 하는 Rust 언어 서버를 보여줍니다. 이 언어 서버는 언어 분석을 수행하지 않고 GotoDefinition 요청에 대해 미리 정의된 결과만 반환합니다.
match cast::<GotoDefinition>(req) {
    Ok((id, params)) => {
        let uri = params.text_document_position_params.text_document.uri;
        eprintln!("Received gotoDefinition request #{} {}", id, uri.to_string());
        let loc = Location::new(
            uri,
            lsp_types::Range::new(lsp_types::Position::new(0, 0), lsp_types::Position::new(0, 0))
        );
        let mut vec = Vec::new();
        vec.push(loc);
        let result = Some(GotoDefinitionResponse::Array(vec));
        let result = serde_json::to_value(&result).unwrap();
        let resp = Response { id, result: Some(result), error: None };
        connection.sender.send(Message::Response(resp))?;
        continue;
    }
    Err(err @ ExtractError::JsonError { .. }) => panic!("{err:?}"),
    Err(ExtractError::MethodMismatch(req)) => req,
};
언어 서버의 전체 소스 코드는 VS Code 예제 저장소에서 찾을 수 있습니다.
확장 프로그램의 TypeScript 코드 내에서 @vscode/wasm-wasi-lsp npm 모듈을 사용하여 WebAssembly 언어 서버를 만들 수 있습니다. VS Code for the Web에서 WebAssembly 실행 블로그 게시물에서 자세히 설명하는 WebAssembly Core Extension을 사용하여 WASI 지원을 갖춘 워커로 WebAssembly 코드를 인스턴스화합니다.
확장 프로그램의 TypeScript 코드도 간단합니다. 일반 텍스트 파일에 대한 서버를 등록합니다.
import {
  createStdioOptions,
  createUriConverters,
  startServer
} from '@vscode/wasm-wasi-lsp';

export async function activate(context: ExtensionContext) {
  const wasm: Wasm = await Wasm.load();

  const channel = window.createOutputChannel('LSP WASM Server');
  // The server options to run the WebAssembly language server.
  const serverOptions: ServerOptions = async () => {
    const options: ProcessOptions = {
      stdio: createStdioOptions(),
      mountPoints: [{ kind: 'workspaceFolder' }]
    };

    // Load the WebAssembly code
    const filename = Uri.joinPath(
      context.extensionUri,
      'server',
      'target',
      'wasm32-wasip1-threads',
      'release',
      'server.wasm'
    );
    const bits = await workspace.fs.readFile(filename);
    const module = await WebAssembly.compile(bits);

    // Create the wasm worker that runs the LSP server
    const process = await wasm.createProcess(
      'lsp-server',
      module,
      { initial: 160, maximum: 160, shared: true },
      options
    );

    // Hook stderr to the output channel
    const decoder = new TextDecoder('utf-8');
    process.stderr!.onData(data => {
      channel.append(decoder.decode(data));
    });

    return startServer(process);
  };

  const clientOptions: LanguageClientOptions = {
    documentSelector: [{ language: 'plaintext' }],
    outputChannel: channel,
    uriConverters: createUriConverters()
  };

  let client = new LanguageClient('lspClient', 'LSP Client', serverOptions, clientOptions);
  await client.start();
}
코드를 실행하면 일반 텍스트 파일의 컨텍스트 메뉴에 Goto Definition 항목이 추가됩니다. 이 동작을 실행하면 해당 요청이 LSP 서버로 전송됩니다.
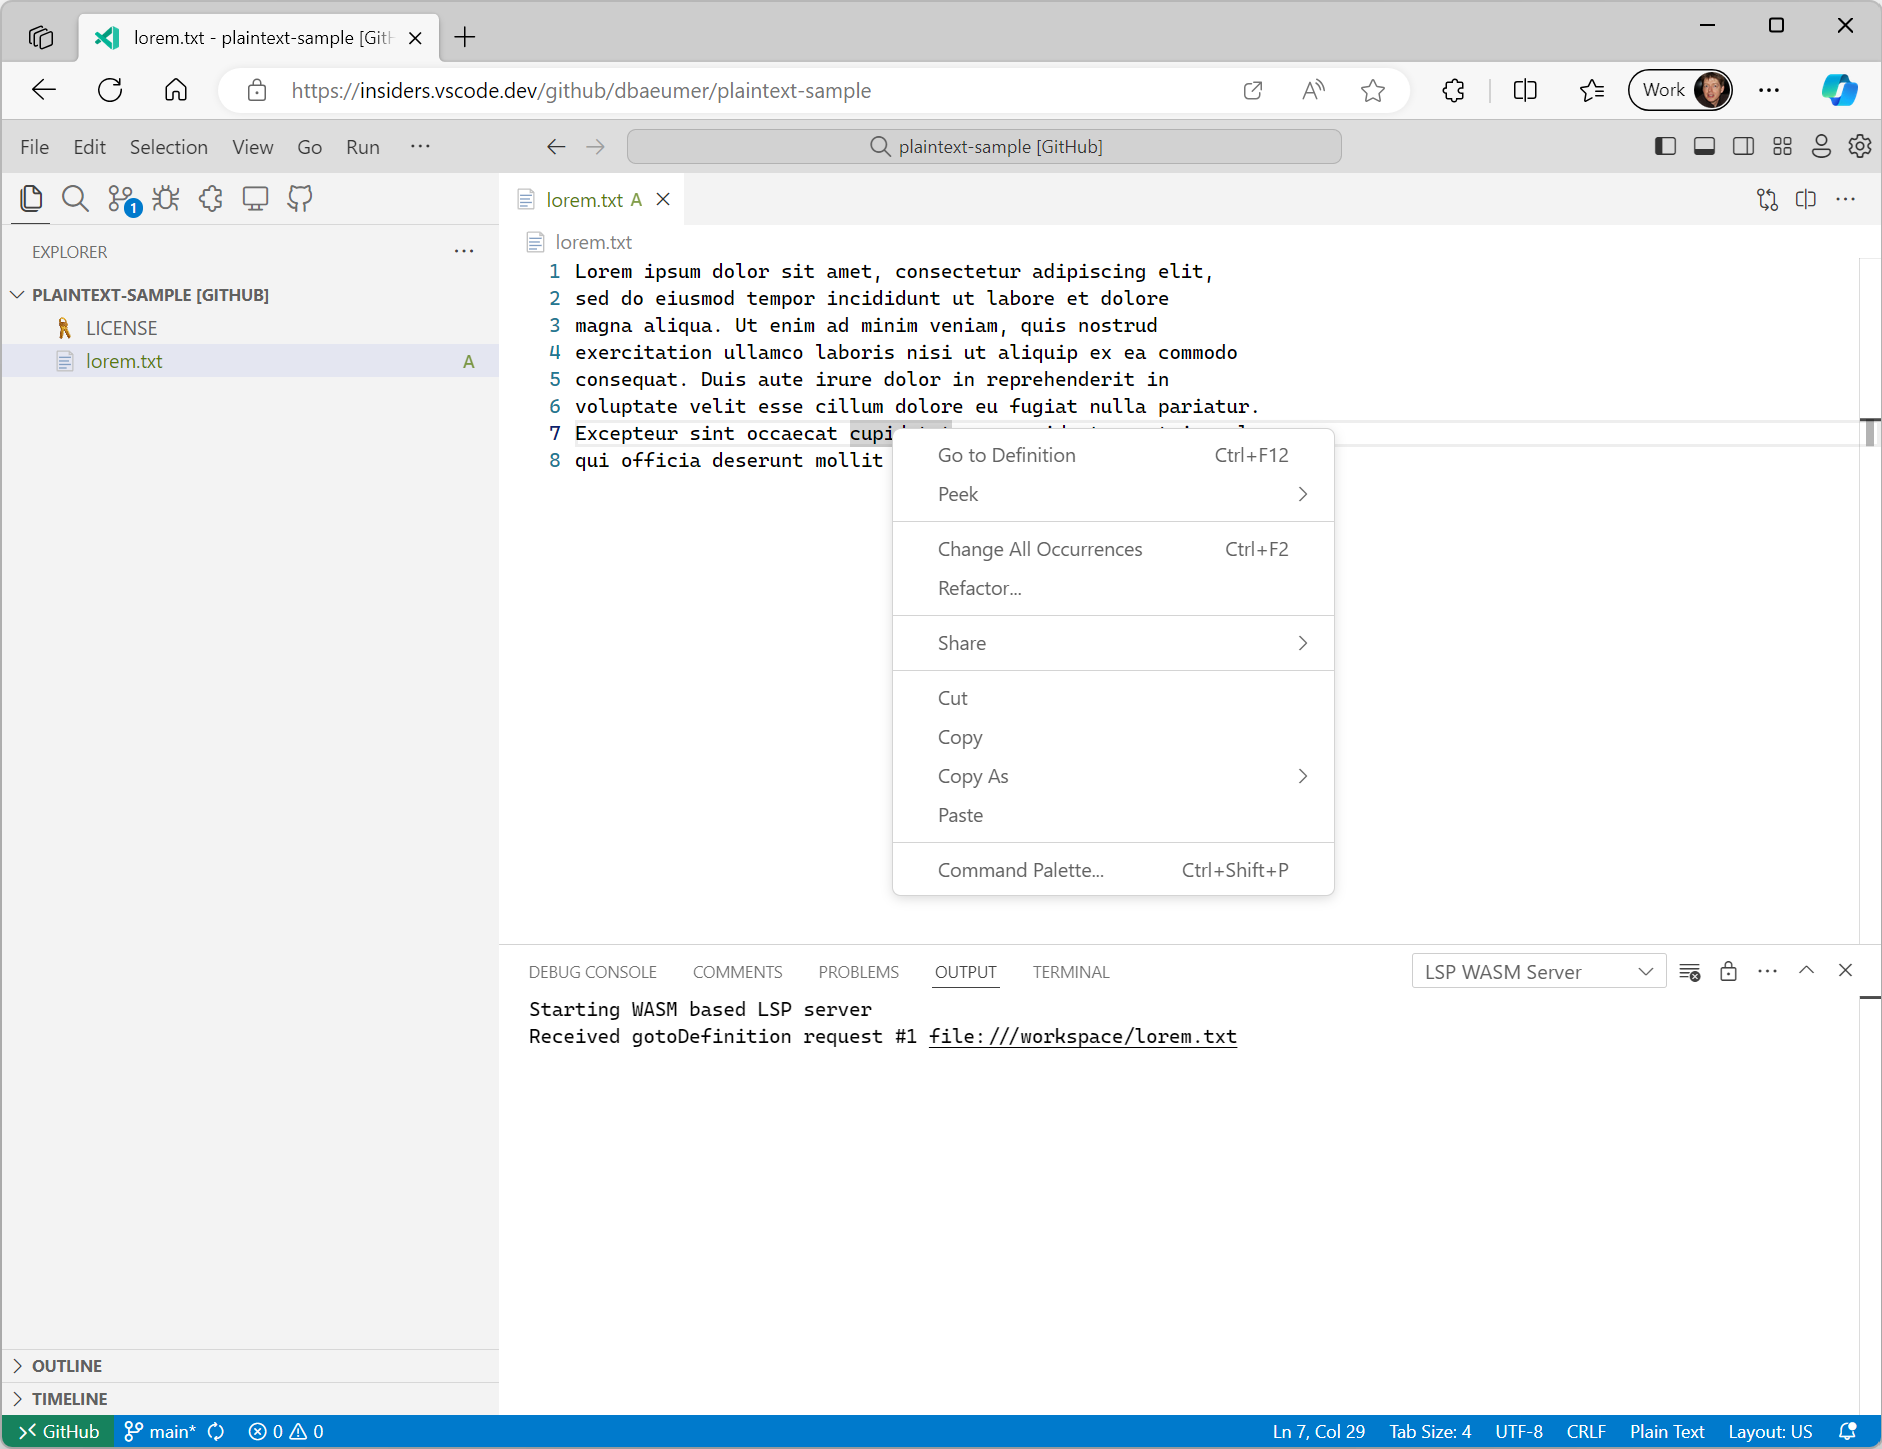
@vscode/wasm-wasi-lsp npm 모듈이 문서 URI를 워크스페이스 값에서 WASI Preview 1 호스트에서 인식되는 값으로 자동 변환한다는 점에 유의해야 합니다. 위의 예에서 VS Code 내의 텍스트 문서 URI는 일반적으로 vscode-vfs://github/dbaeumer/plaintext-sample/lorem.txt와 같은 형식이며, 이 값은 WASI 호스트 내부에서 인식되는 file:///workspace/lorem.txt로 변환됩니다. 언어 서버가 URI를 VS Code로 다시 보낼 때도 이 변환이 자동으로 발생합니다.
대부분의 언어 서버 라이브러리는 사용자 정의 메시지를 지원하므로, Language Server Protocol 사양에 아직 없는 기능을 언어 서버에 쉽게 추가할 수 있습니다. 다음 코드 스니펫은 이전에 사용했던 Rust 언어 서버에 특정 워크스페이스 폴더의 파일 수를 세는 사용자 정의 메시지 핸들러를 추가하는 방법을 보여줍니다.
#[derive(Debug, Eq, PartialEq, Clone, Deserialize, Serialize)]
#[serde(rename_all = "camelCase")]
pub struct CountFilesParams {
pub folder: Url,
}
pub enum CountFilesRequest {}
impl Request for CountFilesRequest {
type Params = CountFilesParams;
type Result = u32;
const METHOD: &'static str = "wasm-language-server/countFilesInDirectory";
}
//...
for msg in &connection.receiver {
match msg {
//....
match cast::<CountFilesRequest>(req) {
Ok((id, params)) => {
eprintln!("Received countFiles request #{} {}", id, params.folder);
let result = count_files_in_directory(¶ms.folder.path());
let json = serde_json::to_value(&result).unwrap();
let resp = Response { id, result: Some(json), error: None };
connection.sender.send(Message::Response(resp))?;
continue;
}
Err(err @ ExtractError::JsonError { .. }) => panic!("{err:?}"),
Err(ExtractError::MethodMismatch(req)) => req,
}
}
//...
}
fn count_files_in_directory(path: &str) -> usize {
WalkDir::new(path)
.into_iter()
.filter_map(Result::ok)
.filter(|entry| entry.file_type().is_file())
.count()
}
이 사용자 정의 요청을 LSP 서버로 보내는 TypeScript 코드는 다음과 같습니다.
const folder = workspace.workspaceFolders![0].uri;
const result = await client.sendRequest(CountFilesRequest, {
folder: client.code2ProtocolConverter.asUri(folder)
});
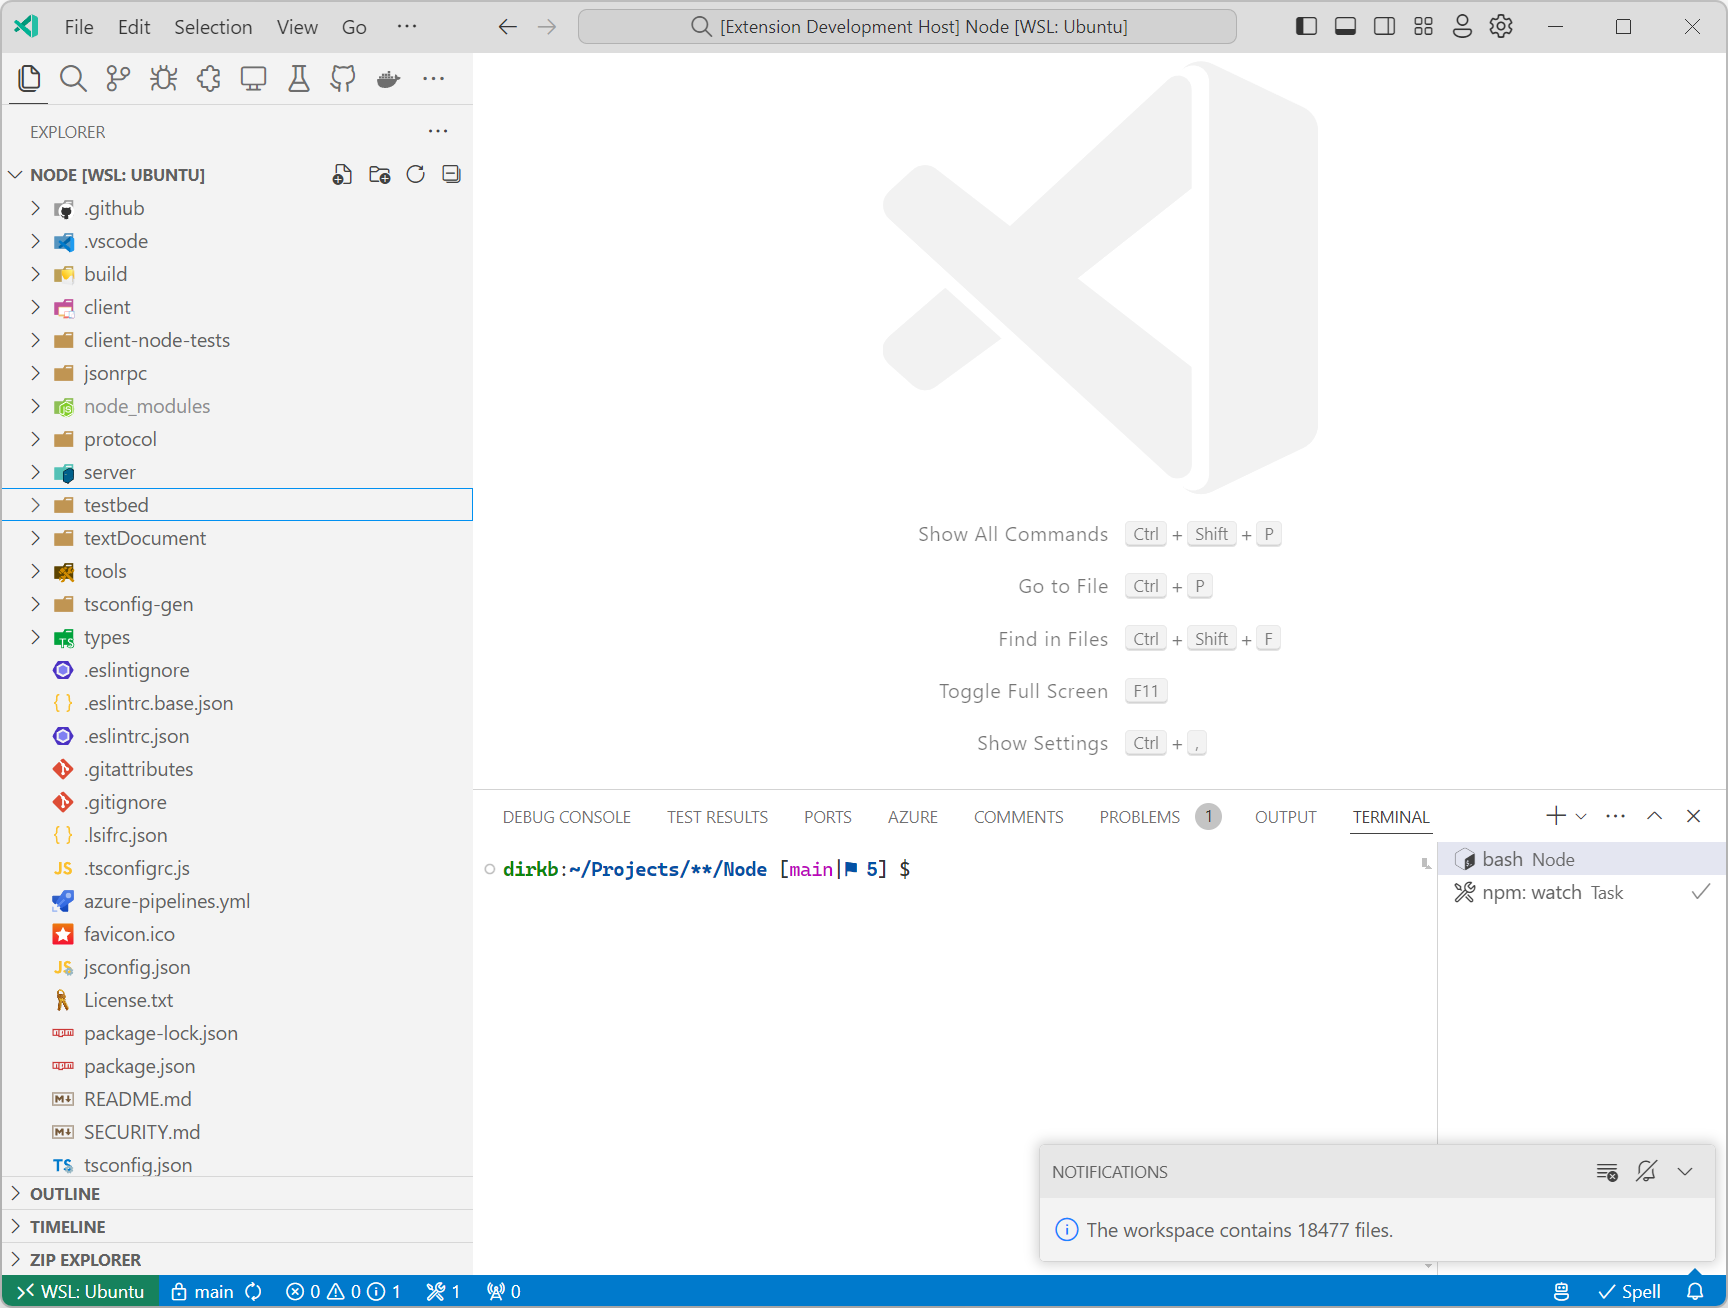
window.showInformationMessage(`The workspace contains ${result} files.`);
vscode-languageserver 리포지토리에서 이를 실행하면 다음과 같은 알림이 표시됩니다.
언어 서버가 Language Server Protocol 사양에 지정된 기능을 반드시 구현할 필요는 없다는 점에 유의하십시오. 확장 프로그램이 WASI Preview 1 대상만 컴파일할 수 있는 라이브러리 코드를 통합하려고 하는 경우, VS Code의 컴포넌트 모델 구현이 WASI 0.2 미리보기를 지원할 때까지 사용자 정의 메시지를 사용하는 언어 서버를 구현하는 것이 좋은 선택일 수 있습니다.
다음 단계
이전 블로그 게시물에서 언급했듯이, VS Code에 WASI 0.2 미리보기를 구현하기 위한 노력을 계속하고 있습니다. 또한 WASM으로 컴파일되는 Rust 외 다른 언어를 포함하여 코드 예제를 확장할 계획입니다.
감사합니다.
Dirk와 VS Code 팀
행복한 코딩 되세요!